How to Receive an Order
If you have a Pending, Approved, Ordered, or Pre-received order in SoftMouse.NET, and the order has arrived at your facility, it is now time to receive the order digitally in SoftMouse.NET! Receiving your order is the final step that allows you to easily add the animals within your to Order your database by automatically generating the animal and cage data from Order details.
TIP: It is possible to pre-receive your Order to prepare your cages in advance. For more information, please see this FAQ.
There are 2 ways to receive an Order in SoftMouse.NET:
1. Here are the steps to Receive an Order from the Order List:
- Click the Module Menu at the top right of the screen
- Click the pink Orders icon -- This takes you to the Order List page
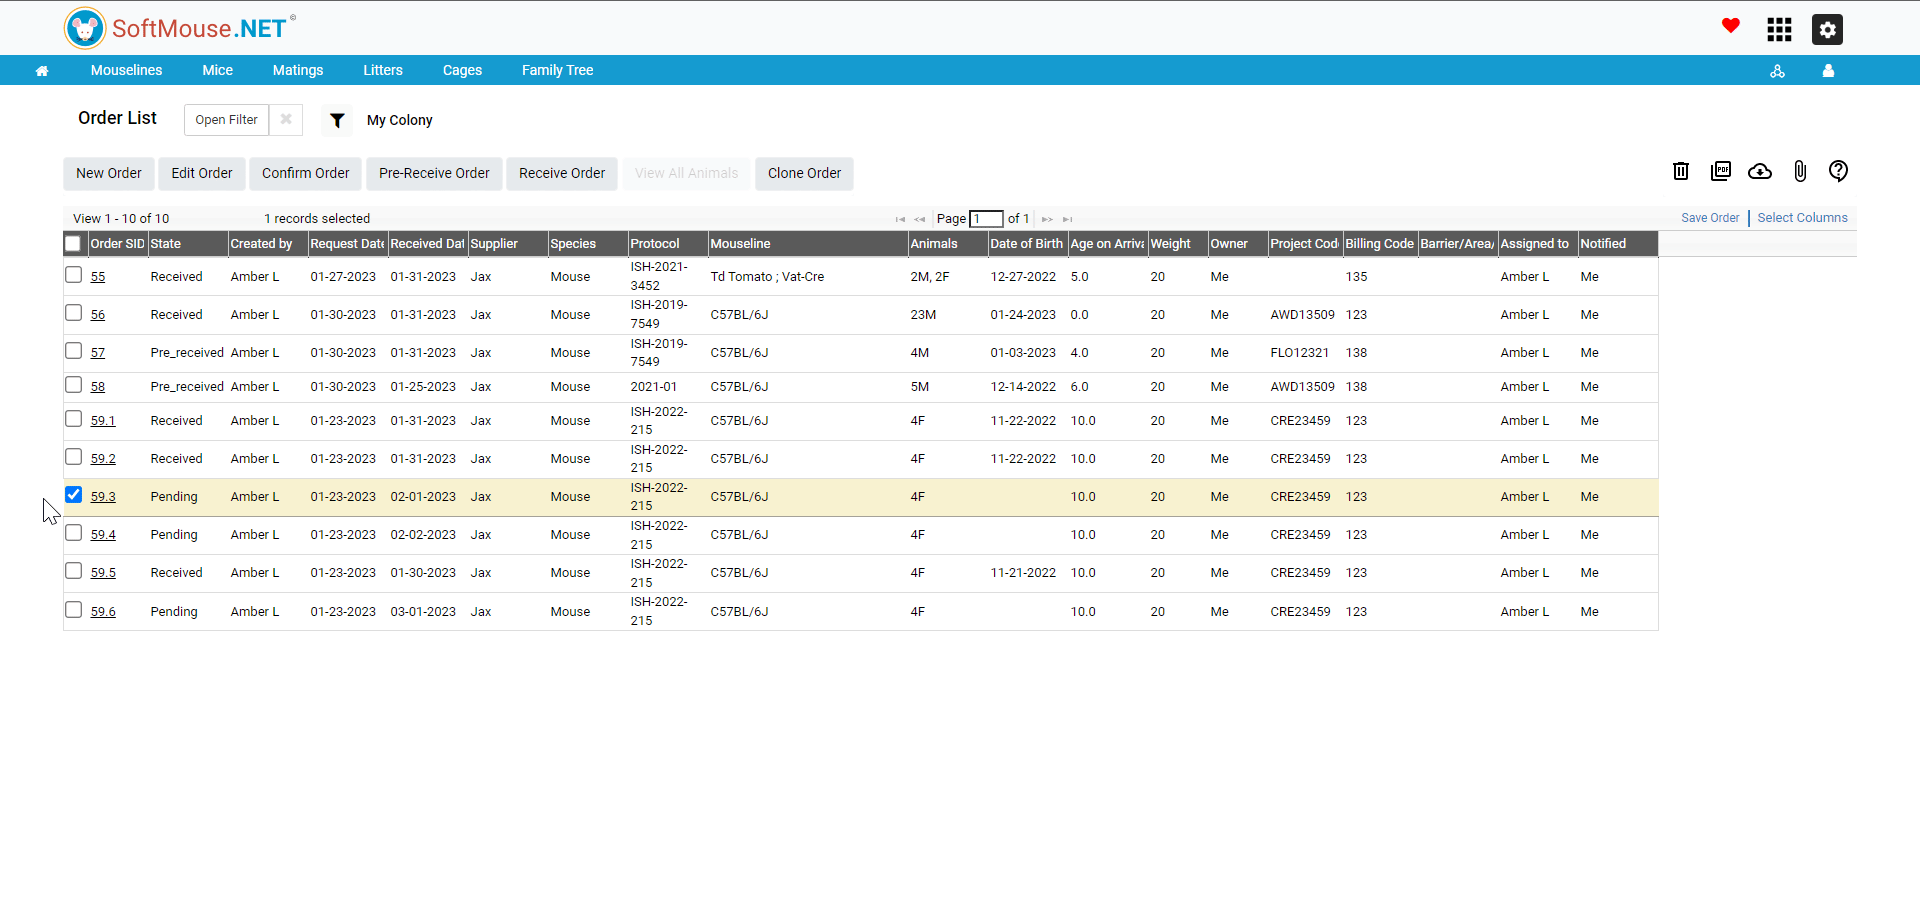
- On the Order List page, select the order you wish to receive.
- Click the Receive Order button on the top menu of the screen -- This takes you to the Create New Mice page
- The Create New Mice Page will be pre-populated based on the order details. You can edit the details here as needed. When ready to add the animal data to the database, click 'Add' -- Note: when you edit the details from this page, the order details will also be edited.
- On the Move Mice page, group your ordered animals as you intend to house them at your facility. Once ready, click 'Create/Update Cages'. -- This takes you to the Move Mice Summary page
- On the Move Summary Page, you can print your cage cards, and view your newly received animals in your SoftMouse.NET Colony.
When you receive an Order, the following occurs simultaneously:
- The State of the Order changes to "Received,"
- The State of the Animals is changed to "Mating" or "Stock"
- The State of the Cages is changed to "Active."
2. Here are the steps to Receive an Order from the Edit Order Page:
- Click the Module Menu at the top right of the screen
- Click the pink Orders icon -- This takes you to the Order List Page
- On the Order List page, select the order you wish to receive, and click the Edit Order Button or click the Order SID hyperlink. -- Either option takes you to the Edit Order Page
- On the Edit Order Page, click the Receive Order button on the top menu of the screen -- This takes you to the Create New Mice page
- The Create New Mice page will be pre-populated based on the order details. You can edit the details here as needed. When ready to add the animal data to the database, click 'Add' -- Note: when you edit the details from this page, the order details will also be edited.
- On the Move Mice page, group your ordered animals as you intend to house them at your facility. Once ready, click 'Create/Update Cages'. -- This takes you to the Move Mice Summary page
- On the Move Summary Page, you can print your cage cards, and view your newly received animals in your SoftMouse.NET Colony.
When you receive an Order, the following occurs simultaneously:
- The State of the Order changes to "Received,"
- The State of the Animals is changed to "Mating" or "Stock"
- The State of the Cages is changed to "Active."
Note: If you have already pre-received your order, receiving your Order is very simple! Please see the following steps:
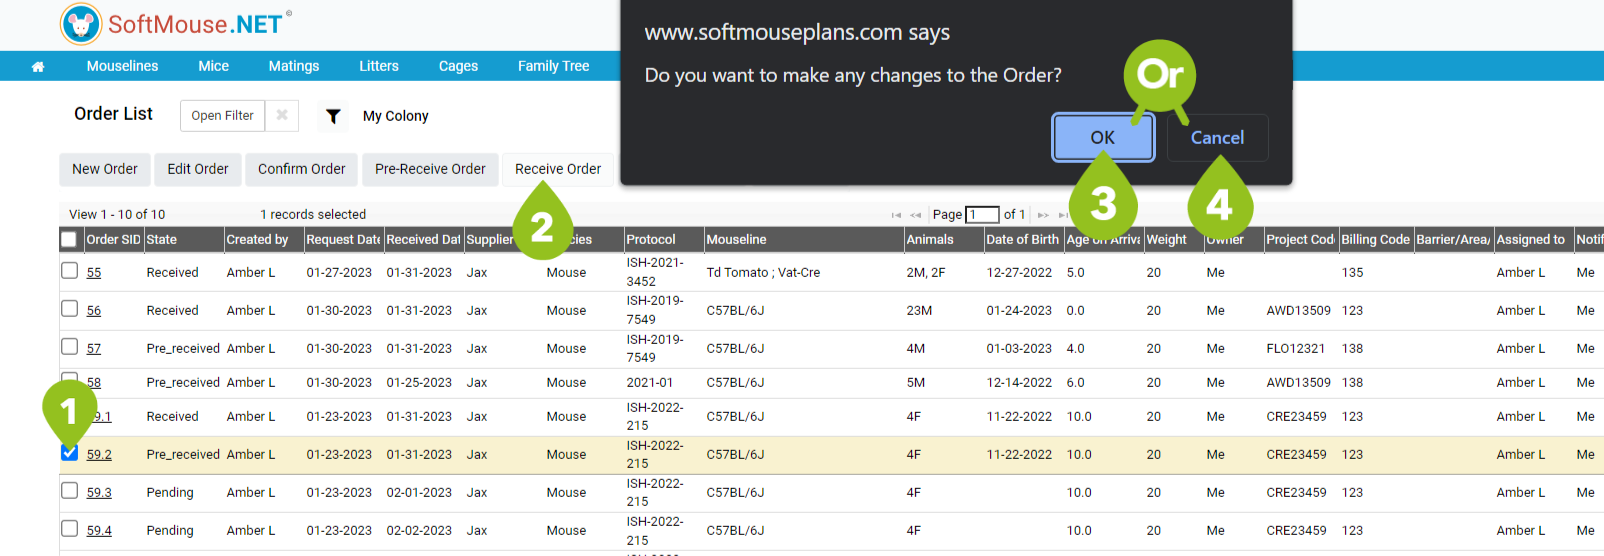
- Select the Order from the Order List, or Navigate to the Edit Order Page.
- Click the Receive Order Button -- this will trigger a pop-up
- If you do wish to make any changes to the order click OK. -- This will take you to the New Mice Page. Please follow steps 5-7 in the instructions above to complete the process
- If you do not want to make any changes to the order, click cancel. The order's state will change from pre-received to received and the animal's state will change from Ordered to Stock/Mating respectively.
If you have any further questions, please contact us with your inquiry.