How to Scan+Collect Samples
When it's time to perform the actual takedown, the SoftMouse.NET Scan+Collect workflow can be used as your collection guide in real-time. All you need is: your computer, a scanner (optional) and your animals!
Here are the steps:
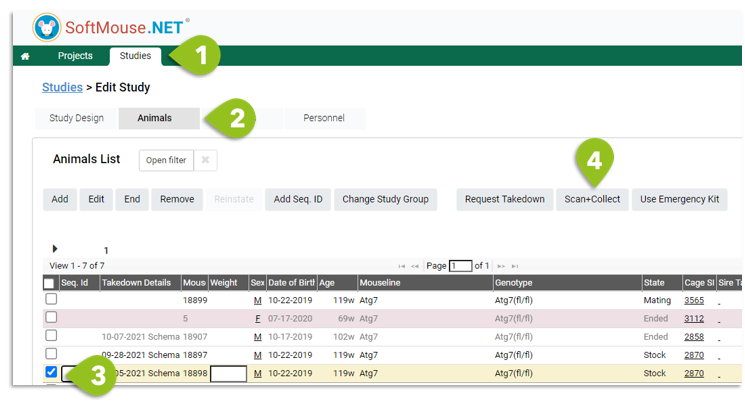
- Go to the Study Edit page
- Click the Animals tab
- Select the animal(s) that you will be taking down --- use the Filter to narrow down the list, e.g. you can search by Takedown Date or Animal ID or Schema name, etc.
NOTE: If you want to select all animals that you will be taking down that it ok. Otherwise, you can select one animal at a time if that is easier, based on your physical workflow. - Click Scan+Collect button
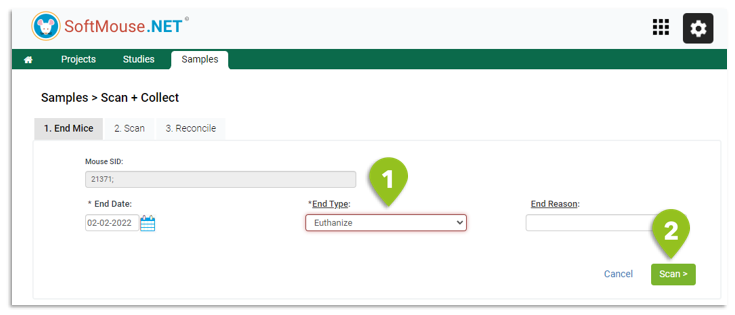
Step 1:
- Enter the End details for the mice as they will be marked as ended at the end of the workflow
- Click Scan
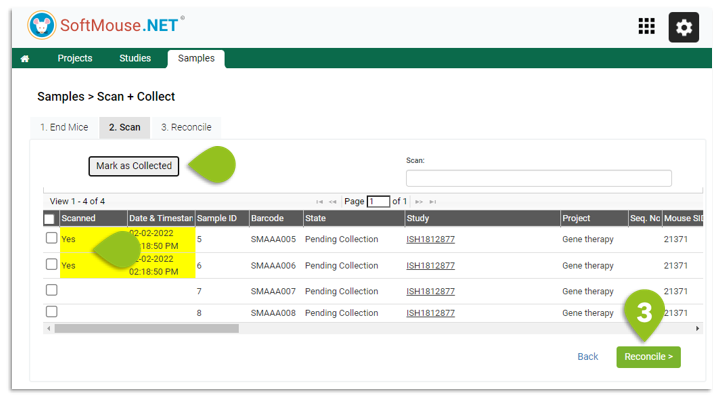
Step 2:
- As you are making your collection, scan the labeled tube. On scan, you will see a date and timestamp populate in the respective columns as a visual indicator that the tube was scanned --- if you do not have a scanner, you can select the sample and click the Mark as Collected button
- If any abnormality is found on a sample and hence the sample will not be collected as planned, do not scan this tube
- Click Reconcile
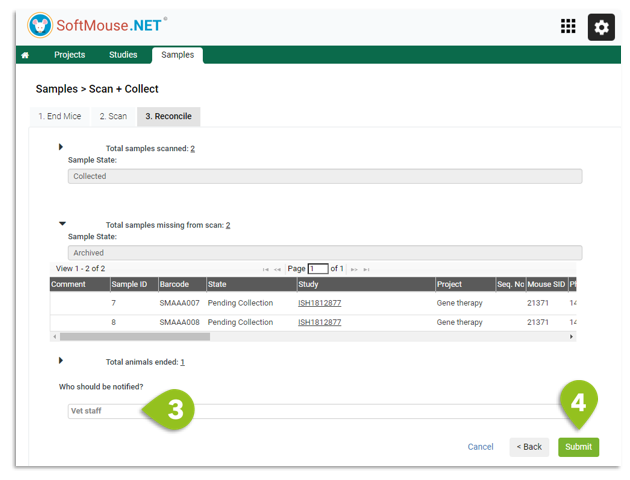
Step 3:
- Confirm the details of the scan
- For any sample that was missing from the scan, enter a Comment as to why the sample was not collected
- Select a user or group from the Who Should be Notified drop down, e.g. the Biorespository team, so that they receive an email that samples were collected.
- Click Submit
Done! Now your samples will be marked as collected, with a date, time and user stamp on when and who made the collection.
If you have any further questions, please contact us with your inquiry.